Whether you want to WordPress website from scratch or would like to customize the existing one, you’ll most likely feel the need to add elements that can help spruce up your website layout.
For instance, you can make use of custom fonts to give a refreshing look to your WordPress theme. Thankfully, browsers come with several built-in fonts that can be used in your theme’s style.css file. But such fonts are more likely to be used commonly by many users, and thus, using the fonts that have been used several times may seem uninteresting to you and your site visitors. On the other hand, adding custom fonts can help your site stand out from a lot of your competitors’ websites.
Today, you can find several WordPress themes that come prepackaged with tons of custom fonts. But, loading all of the fonts can make your site to load slowly. So, to help you load the custom fonts properly (without making your website slow down), we’ll be discussing about how custom fonts can be added in WordPress using the most recommended approaches such as: Google Fonts and CSS3 @Font-Face.
How You Can Find Custom Fonts?
Long gone are the days when using fonts proved to be an expensive deal. Thanks to places such as FontSquirrel, Google Fonts, and Adobe Edge Web Fonts to name a few, you can now find great free to use web fonts.
Remember to ensure that the fonts you’re choosing has a license that match up to your needs. Also, keep in mind that you might need to use more fonts – apart from the ones available for free – to be used for commercial purposes. If that’s the case, then you can prefer buying premium fonts from Typekit and other places.
Once you’ve found the font, you would like to use in your WordPress theme, you can follow any one of the below discussed approaches to add custom fonts in your site.
Adding Free Custom Fonts in WordPress Theme Using Google Fonts
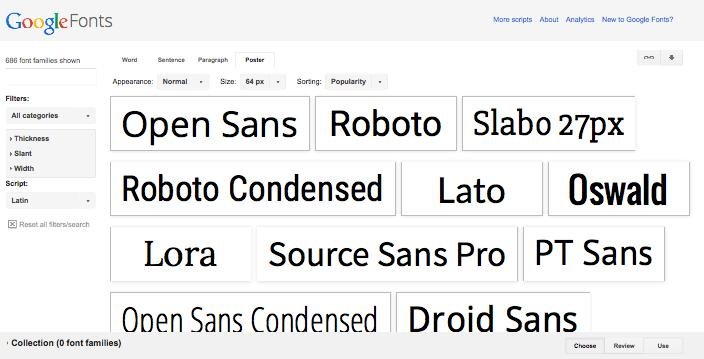
Google fonts, is one of the most recognized and preferred resource, which help you access and add some beautiful fonts in your website design. And WordPress users can look for free Google custom web fonts that they want to add to their sites.
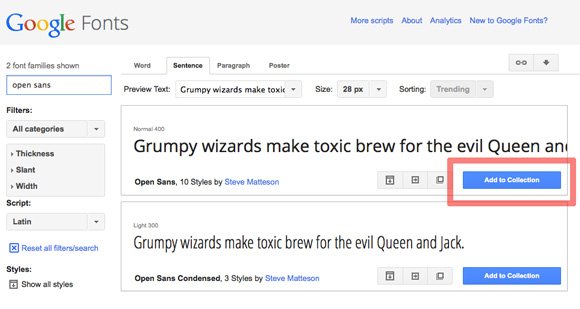
The first thing, you’ll have to do is to find a suitable Google font you wish to use in your theme. To do so, simply head towards the Google fonts library, and start browsing through the library. Once you’ve found the font of your choice, you just need to click on the “Quick-use” button (i.e. highlighted in the red square) as shown in the image below:
Clicking on the button will redirect you to a new page. Just keep on scrolling down the page until you can see the following code section:
Simply copy the embedded code given underneath the standard tab (as shown in the above image) and paste it within your WP parent theme or child theme’s header.php file. Make sure to paste the code just below the
tag.This will help you add a custom Google font in your WordPress theme. Next, use that font in your theme’s style.css file using the below code snippet:
.h1 yoursite-title {

font-family: yourFont-name;

}
Following a More Comprehensive Approach – CSS3 @Font-Face method
The second one is a comprehensive and most recommended approach – that provides a direct way to add custom fonts in WordPress with the help of CSS3 @font-face method. Using this method gives you the ability to utilize any font that you like on your site.
To use the @font-face method, you first need to download the font of your choice in a web format. If you don’t have the type of web format needed for your font, then you can choose to convert the font into the desired format with the help of Font Squirrel Webfont generator.
After receiving the web font files, allow your font to be uploaded on your web server. For this purpose, you can use your cPanel’s FTP or File Manager.
Note: The ideal place where you should upload the fonts is within a newly created “fonts” folder available in your theme (or child theme‘s) directory.
After getting the font uploaded, simply load it into your theme’s style.css file via the CSS3 @font-face rule as follows:
@font-face {

font-family: yourFont-name;

src: url(http://yoursitedomain.com/wp-content/themes/my-theme/fonts/yourFont-name-Regular.ttf);
font-weight: normal;

}
Note: Remember to change the font-family, as well as, url in the above code snippet with the font you’ve uploaded and your own site url.
Next, you can now use the font at any place you like in your WP theme’s stylesheet using the below code:
.h1 yoursite-title {

font-family: Font-name;

}
Note: The @font-face rule only applies to the modern browser versions, and not all of the files support it.
Final Words:
Using the CSS3 @font-face rule to load the fonts directly might not prove to be a feasible solution. And so, when using the Google web fonts (or Typekit fonts), it is recommended that you should serve the font – from any free resource – directly from their web server; this will result in excellent performance.
About The Author:
Juana Steves is a senior software developer for Xicom – a Offshore Software Development Company. Which delivers most extensive software applications and solutions for different industry verticals. Join her on Twitter to get the latest reviews and updates.


Leave a Reply